The dubbing process involves extracting an existing audio track from a video clip for later recording.
The dubbing process is pretty easy in iMovie for MacOS, but it can get complicated depending on how much quality work you need to do.
Advertising
Advertising
Next, we will tell you how you can replace the sound of a video via iMovie.
Removing and replacing audio in iMovie
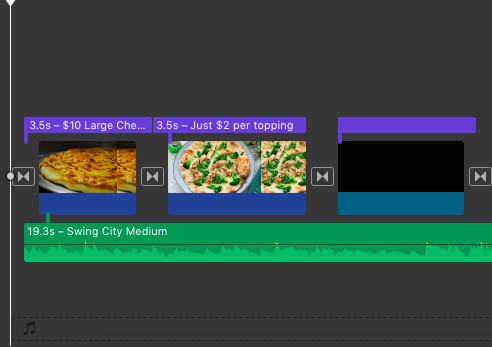
First you need to remove the old soundtrack in a video clip, for this you need to create a project and drag your video clip into it, which already includes an audio track. In the iMovie app on your Mac, create a new project by clicking the + icon in the top right corner. After that, in your Project Library, find the folder containing the video you want to use or search your Media Library. Find the video clip, then drag it into the iMovie timeline tab.

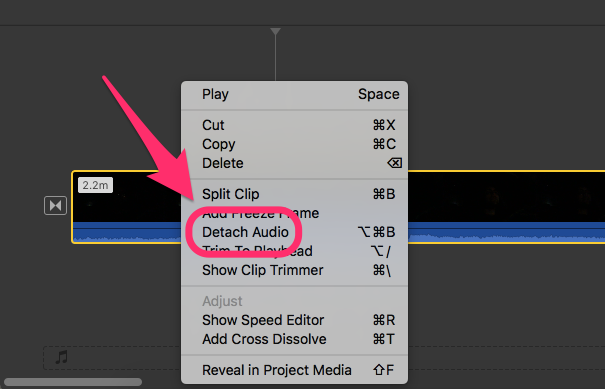
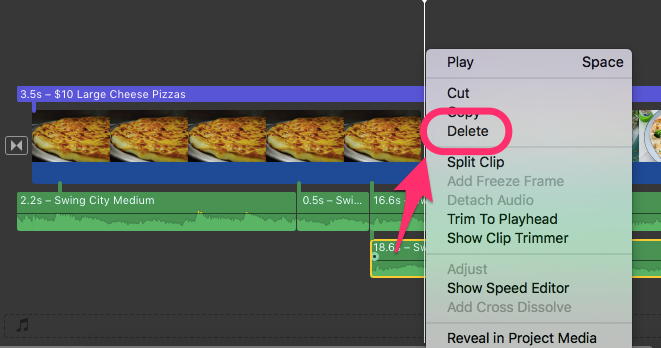
Now select this clip, and then in the menu bar,select the "Change" command. Click on "Detach Audio" from this menu. (Alternatively, you can simply right-click to select a clip and select this command there, as it was done in the screenshot.) Note that iMovie split this clip into two independent files: audio and video, so you can freely edit and to manipulate them individually.
Advertising
Advertising
After that, you can very easily removeoriginal soundtrack and drag your own there. Click on the audio track in iMovie and then Delete on the keyboard. After that, you can use the iMovie application’s audio library to drag a new audio file there or import your own file from the Finder.
 Drag the new audio file to the bottom panelbelow the video clip and make sure it is aligned properly to avoid any pauses. Play the entire segment in iMovie and you now have a new video segment with a new audio track.
Combining newaudiotracks with previous audio trackin iMovie
This tactic applies to variousneeds. Combining a new audio track with a previous one is not just dragging and dropping a new audio track. Correct combination of two audio files will help to achieve the correct sounding of all audio tracks and preserve the unity and continuity of sound.
For example, you recorded a video clip where you singa song. In general, everything sounds good, except for a small fragment. Therefore, you recorded another take in which you corrected all the errors that occurred in the first take. Using the substitution process, you insert into the video clip only that part of the audio track that exactly matches the fragment of poor quality and now the entire audio track sounds great. Thus, you have corrected all your mistakes in the sound design of the video clip.
Advertising
Advertising
The process of combining requires a special, correct alignment of both sound tracks plus proper alignment with the video sequence, so that your mouth movements correctly coincide with the sound track.
Advertising
Advertising
As in the previous method, first drag and drop your video clip into a new project, and then right-click on the timeline to select the audio track.
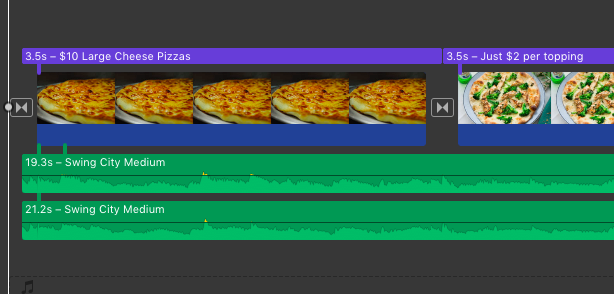
 Pay attention to two parallel audio tracks for one video.
Now, instead of deleting the audio track, youyou need to save it. Then you need to find either another video clip with audio or just a separate audio file that you need to use in the first video. Most likely, both tracks will be the same in duration, but with slight variations in sound design. If you drag a full video clip onto the timeline, you must first select the audio track in it, and then delete the video component. If it's just audio, all you have to do is drag the audio file onto the timeline.
Place the new sound track under the oldsound track. Pay attention to the similarity of vibrations of sound waves, so you know exactly where and how to place a new audio clip. Both audio clips should match each other as precisely as possible and have only minimal differences.


Determine where to stopthe sound of the first sound track and where the second sound track should sound. Then, you need to split both clips at the same point in the timeline. Do this by holding down the Shift key and selecting both audio tracks, then position the cursor at the split point. Click the Edit button in the menu bar and select the Split Clip button. (Or press Command + B.).
Advertising
Advertising
Define on the timeline in the same waysecond split point. You may need to play the audio track several times to determine the time interval that we want to replace. Choose the split area on the track where it is easiest to mix audio tracks, that is, the joints should fall on the area of the minimum audio level. Now, you should have two audio files, each with two timeline separators.
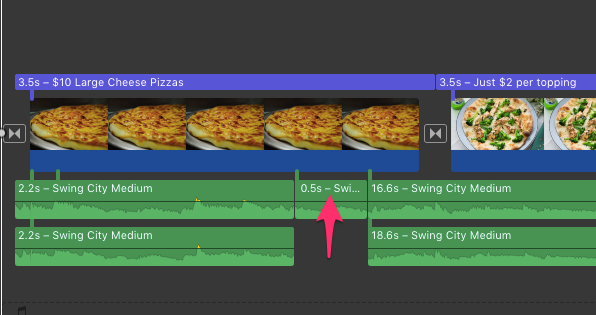

Delete the highlighted time slot at the topaudio track, and then drag the highlighted time interval of the second audio track from the lower file to the upper audio file. For best results, you need to align the audio tracks as closely as possible.

You may need to change your settingssounds and adjust audio clips to make them sound just right, so listen to them several times. After achieving the desired effect, you can remove any unnecessary audio from the second audio track.