Shooting video on your iPhone or iPad is very easy and convenient. However, the file sizes of these videos can be quite
Advertising
Advertising
You can compress the video to reduce the size of itfile, and this is done quite easily. When you compress the video, you can not only save memory, but also easily and quickly share it with friends and family. Below we will tell you how to compress video.
First you need to download the Video Compress application - Reduce Movie Size, Shrink Video. It is available for iPhone and iPad, free and does not contain in-app purchases. There is advertising in the application.
How to compress video in Video Compress
Open the app, give it access to the Photos app, and click the button on the home screen to get started.
Advertising
Advertising
one)Select the location of the video you want.
2)Now select the video itself and clicka tickin the upper-right corner.
3)You will see the original size and the desired size of the video. The desired size can be changed using the slider.
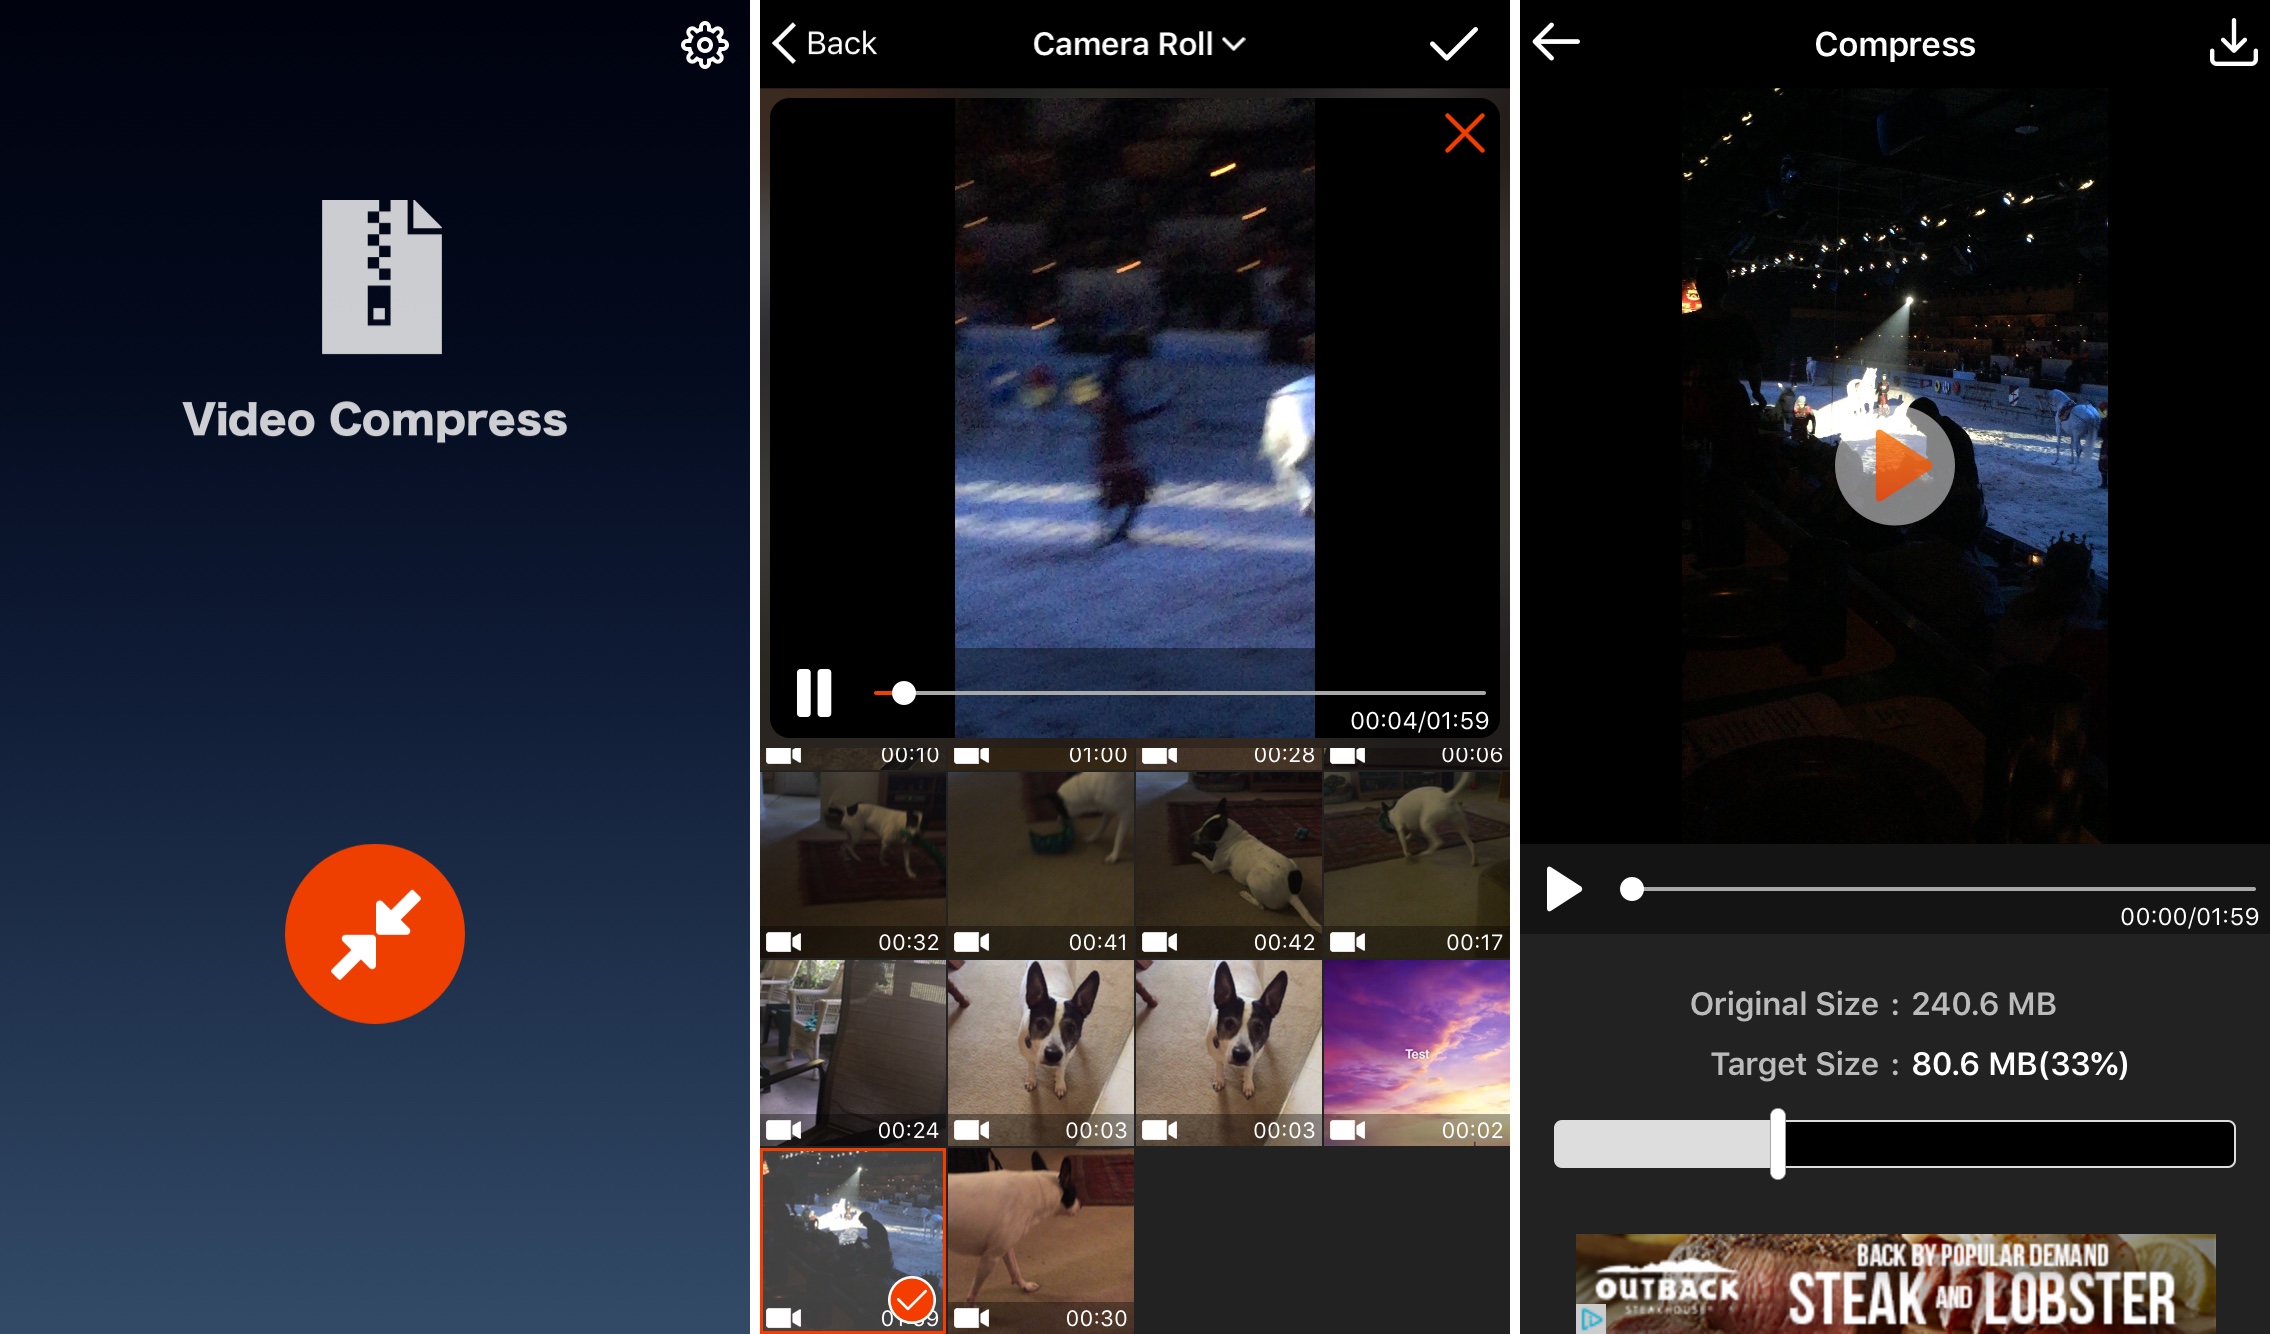

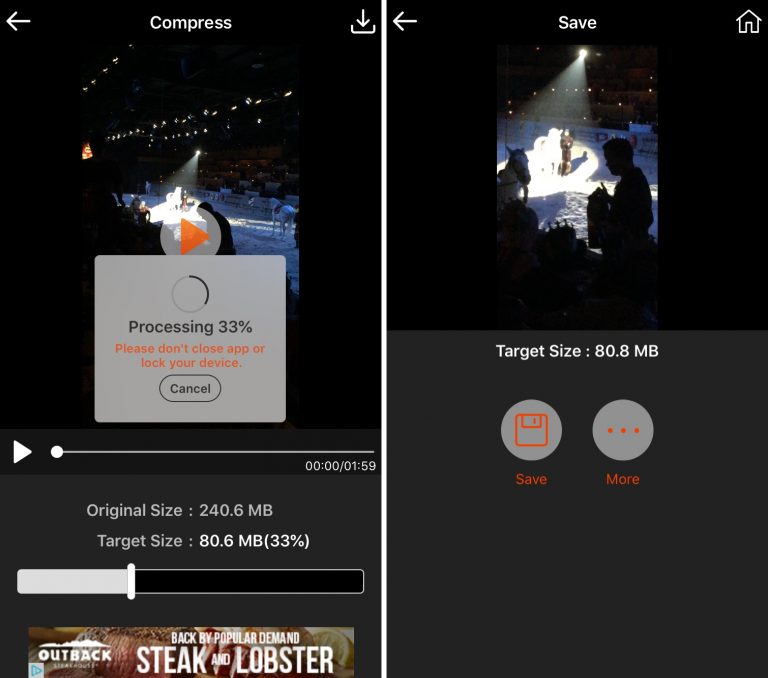
four)Now click the iconShareat the top of the screen. The video compression process will begin.
five)When the process is complete, clickSaveto save the video to your device, orMoreto share it right away.
After this you can click the buttonHomein the upper right corner to compress another video, or simply close the application.

To disable the video preview or change the file format, click the settings icon in the video gear on the main application screen. Here you can configure both options. Available formats are MP4 and MOV.
Compressing videos on iPhone and iPad is very easy, and it does not take much time. Video Compress is just one option out of many, but it’s definitely worth your attention.