Many of us still use 13-inch MacBook Pro laptops. If you also have one and want
Even if you bought yourself an old laptop to save money, it’s worth the expense of installing an SSD, because it's worth it. After that, the laptop will work much faster.
Different 13-inch MacBook Pro models have the same design in terms of assembly. Here is a list of models for which our manual is suitable:
- MacBook Pro (13-inch Mid-2012)
- MacBook Pro (13-inch, late 2011)
- MacBook Pro (13-inch Early 2011)
- MacBook Pro (13-inch Mid-2010)
- MacBook Pro (13-inch Mid-2009)
The characteristics of all these models are different, butthey have the same assembly to use this instruction. Replacing a standard hard drive with any 2.5-inch SATA SSD should be easy.
If your Mac still has a standard HDD, it’stime to replace it. Prices for SSDs have fallen dramatically over the past few years. Now installing an SSD is so profitable that you can not do it. Moreover, you can do it yourself with just a couple of tools.
What do you need
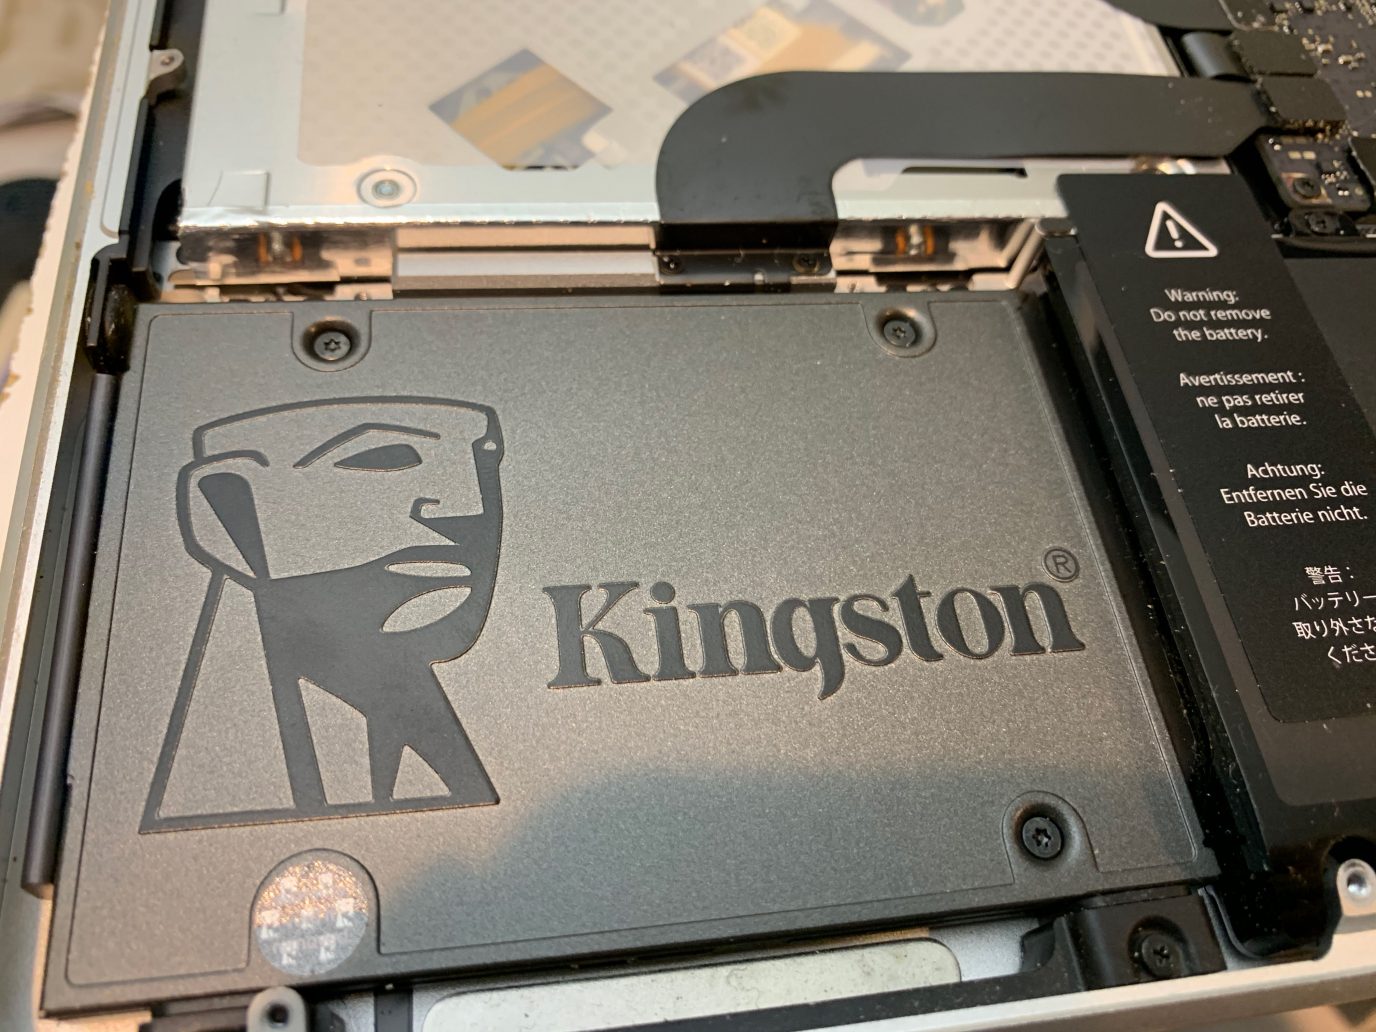
- 5-inch SATA SSD (for example, 480 GB Kingston A400).
- SATA / USB cable or adapter adapter.
- Screwdrivers PH-000 (if it turns out to be too small, then PH00) and T6 Torx. These can be found in many MacBook Pro repair kits, like this one.
When you have everything you need, you can proceed to the instructions. However, do not forget about insurance.
Back Up Your MacBook Pro
Before starting the process, savebackup your data on your MacBook Pro. This can be done quite easily with the help of Time Machine. Later, you can easily restore data from a copy of Time Machine to a new hard drive.
Format SSD and transfer files
To get started, connect the SSD to your Mac using a SATA / USB cable.
one)Open the folderUtilitieson your Mac.
2)Now openDisk utility.
3)Click the SSD icon, then click theErase. Format select APFS for macOS 10.14 Mojave and later, for other versions - Mac OS Extended (journaled). Also select GUID Partition Scheme. Click againErase.
four)Turn off your MacBook Pro and then start it by holding down the combinationCommand + R. Your Mac will start in recovery mode.
five)SelectReinstallmacOS. Now select your SSD drive.
6)When the reinstallation is complete, you can transfer files from a standard hard drive to the drive. The process can take quite a long time.
When the files are transferred, turn off your Mac. We proceed to install the SSD.
Eject a hard drive
Check again that the laptop is turned off. Unplug it from the power source. Now flip the laptop over and lay it on the table. Try to work in good lighting.
one)Remove the 10 screws holding the bottomMacBook Pro case using a PH000 screwdriver. Don't lose the screws; you can put them in a small box. It's better to lay them out in the same order in which you unscrewed them, so as not to get confused later. Some screws are longer than others and may not fit every hole.
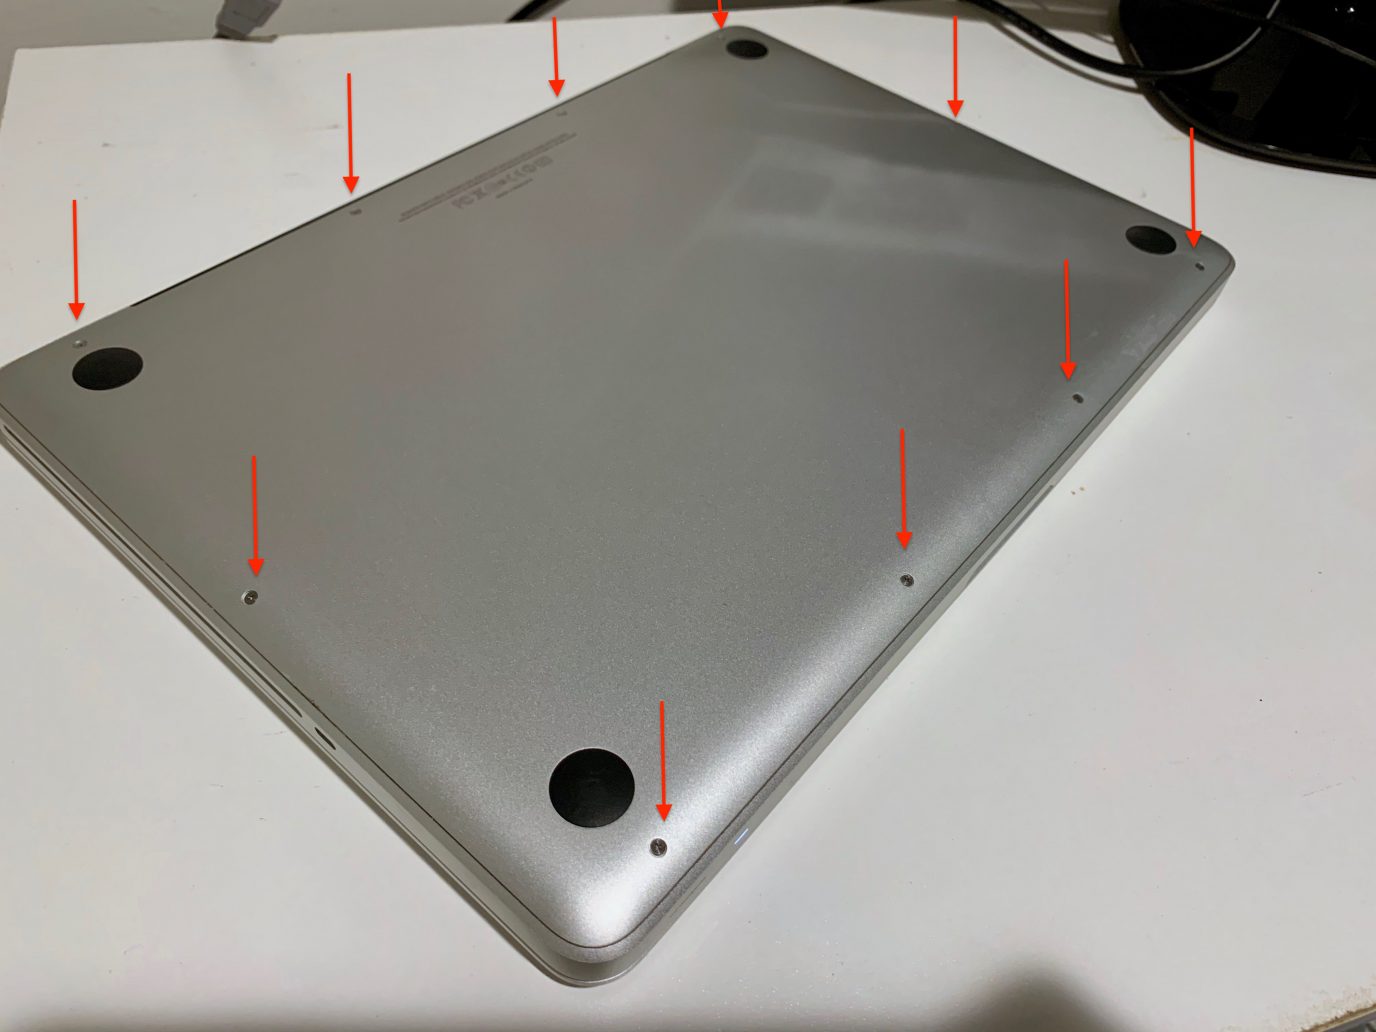

2)Remove the lower housing. The hard drive is in the lower left corner. It is held in place by a plastic panel secured with two screws. Unscrew this panel.
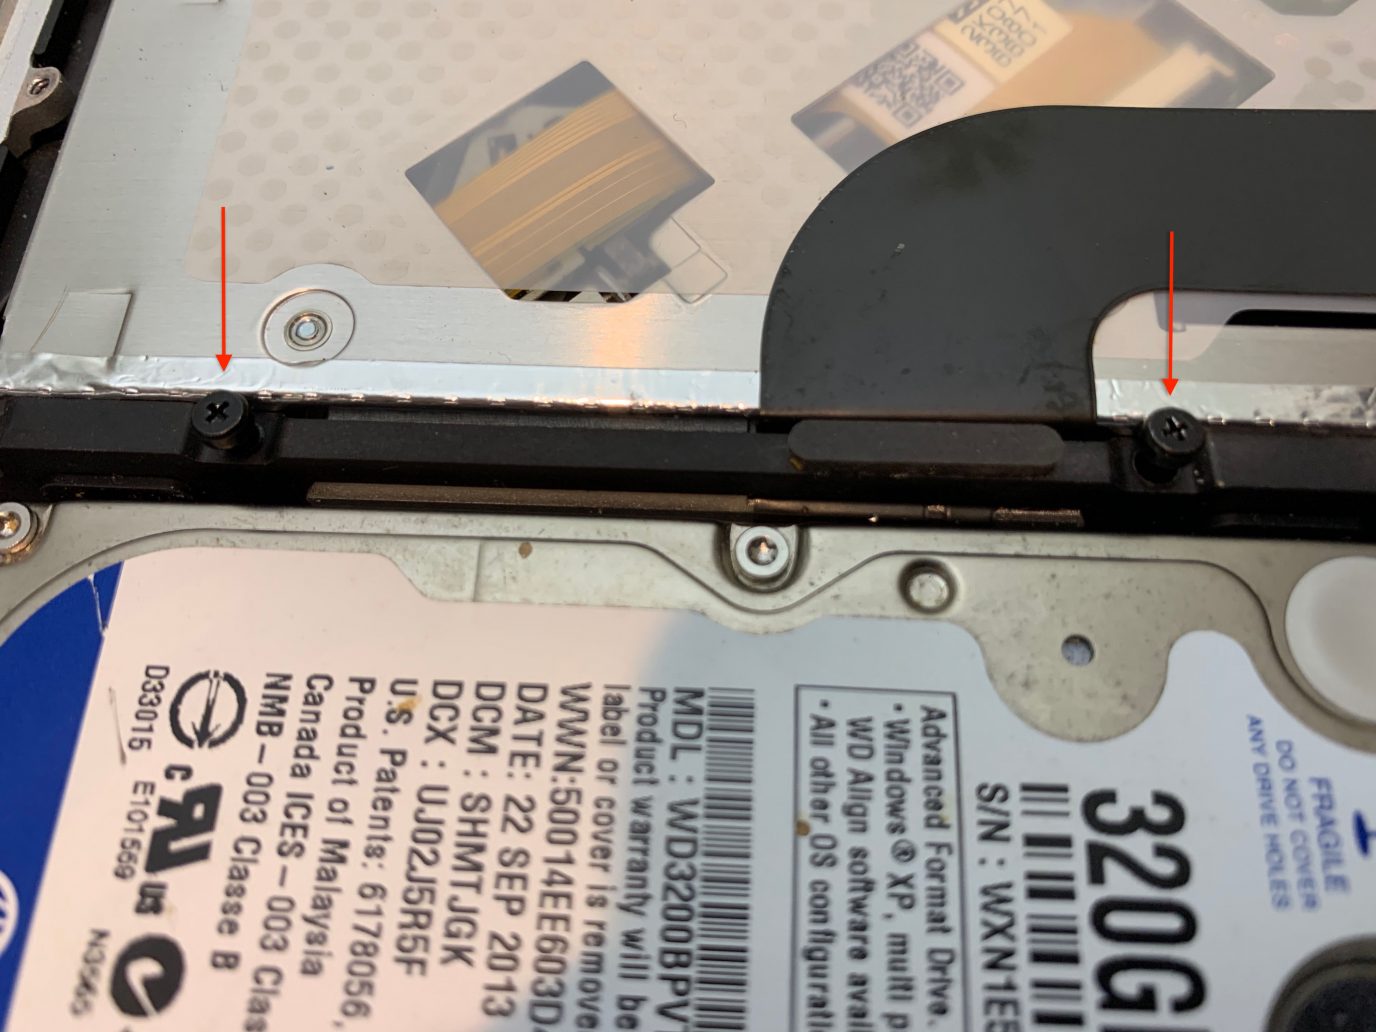

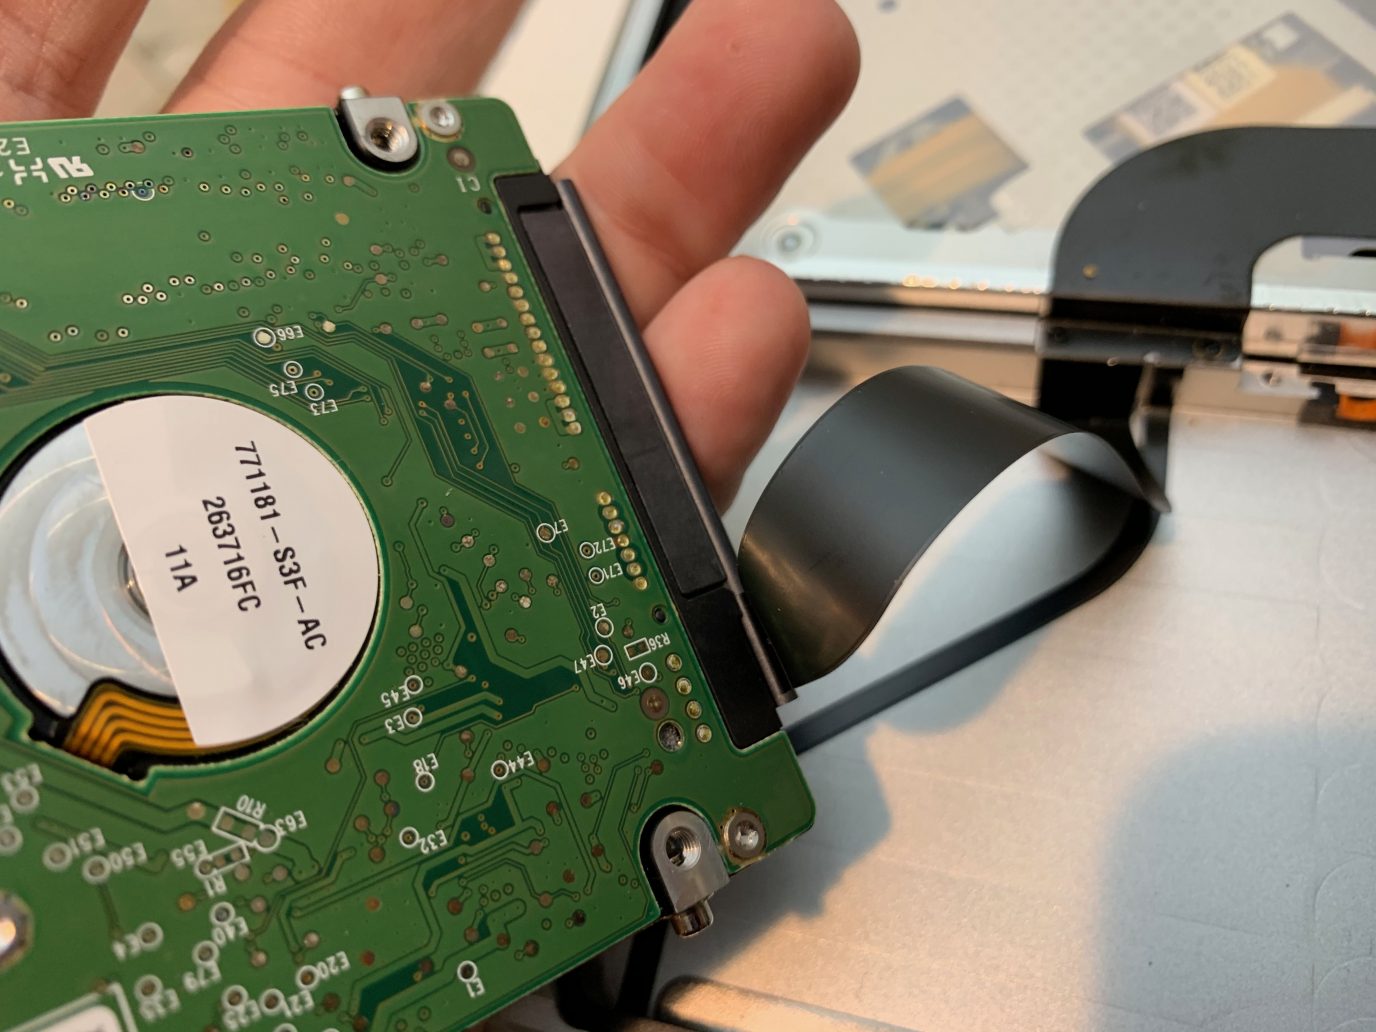
3)Carefully remove the hard drive. Gently disconnect the SATA cable without using too much force.

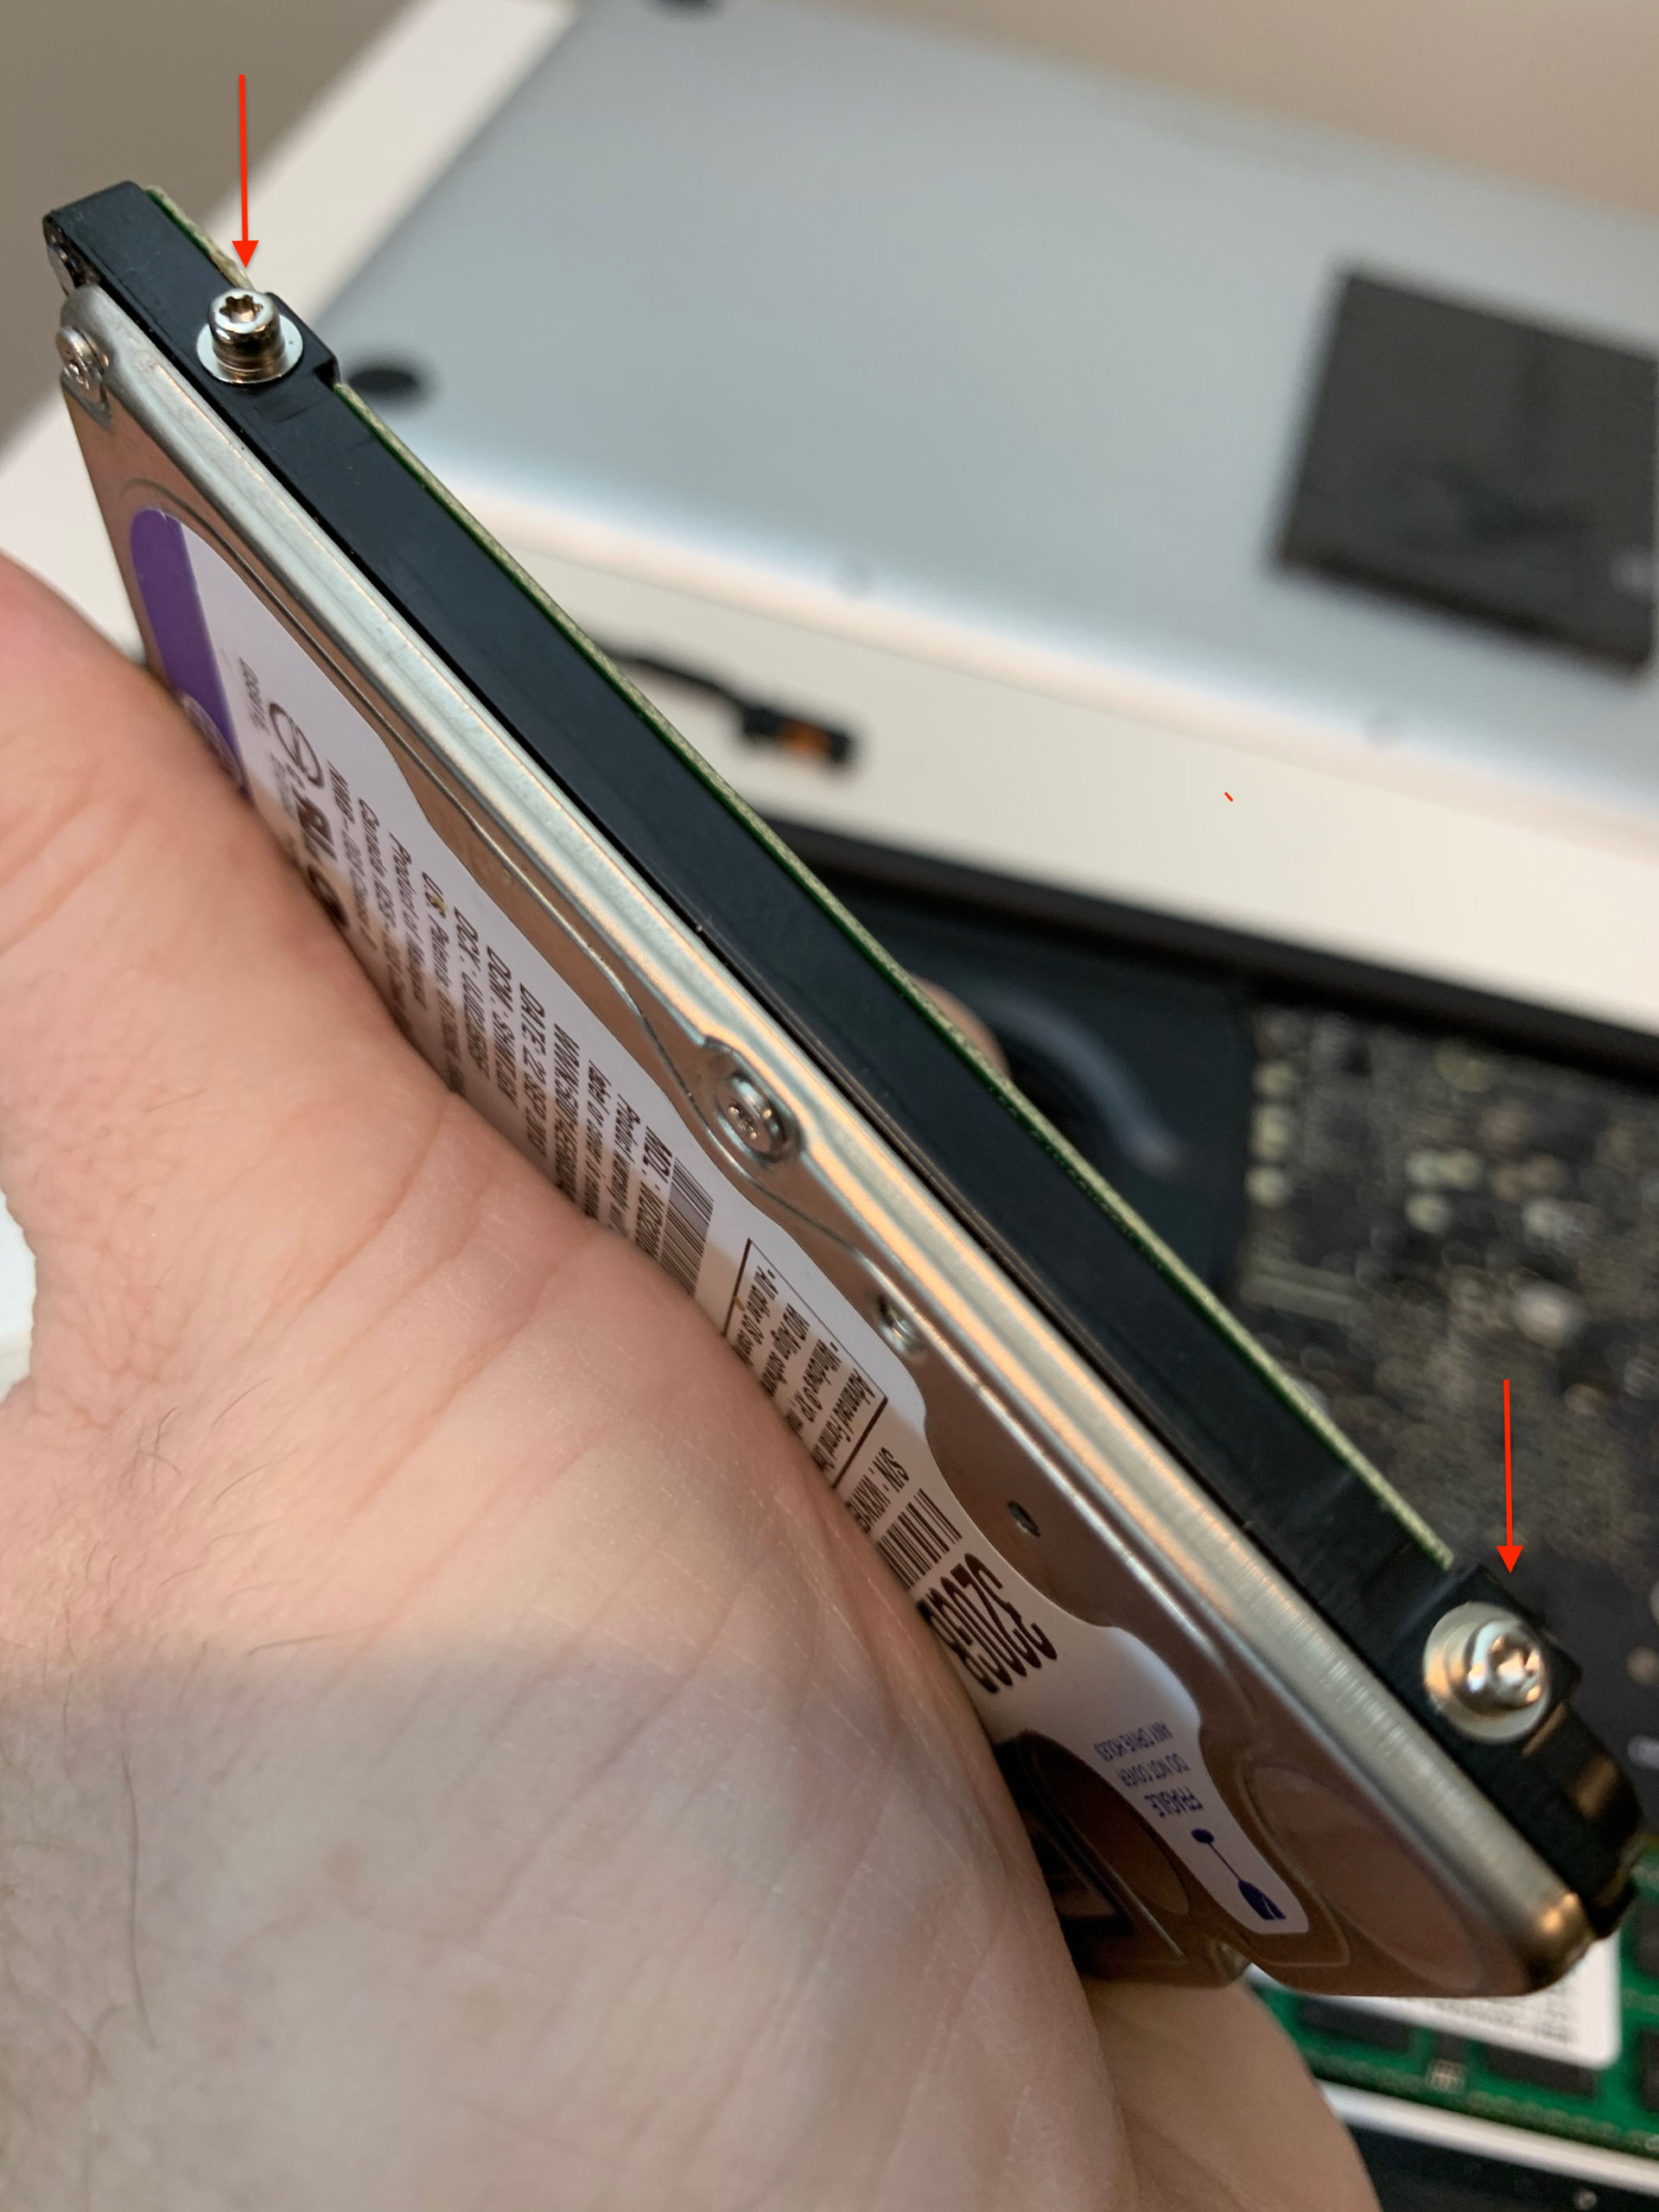
four)The hard drive has four screws that hold it to the case. Unscrew them using a Torx screwdriver. After that, screw the screws into the new SSD drive.

Great job! Paul done.
Install a new SSD
Now you need to install a new SSD and return everything as it was.
one)Carefully connect the SATA cable to the SSD and place the drive into the MacBook Pro case.

2)Screw back the plastic panel that held the hard drive.
3)Now screw the bottom panel of the MacBook Pro case using those 10 screws.
That's all! Your SSD is ready to use. You can turn on your MacBook Pro. If everything went well, the laptop will turn on as usual, but much faster.
Problem solving
Does your Mac not turn on? Apparently, something went wrong. In this case, go to the solutions below.
- Disassemble the laptop case again and check that everything is assembled correctly. The cable may not be tightly connected. Maybe you damaged it in the process. Check all the parts properly.
- Try turning on your Mac by holding down the keyscommand +R. Recovery mode is activated. Launch Disk Utility and select the First Aid option. Perhaps she will find a problem.
- The hard drive you removed should still work. You can use a SATA/USB cable to connect the removed drive to your laptop. After that, turn it on by holding down the keyOption. Select a hard drive and boot it. The process will be slower, but then you can run Disk Utility and find out what the problem is.
If everything went well, we have one more tip on how to make your MacBook Pro even more powerful.
Update RAM on your MacBook Pro
When you replace the hard drive with SSD, laptopwill start to work much faster. You can also replace the laptop’s RAM. Most older models have only 4 GB of RAM, if not less. It can be upgraded to 8 GB or even 16 GB.
By adding RAM and a new SSD, you will make your ownThe 13-inch MacBook Pro is much faster and more powerful. It will start quickly, programs will open instantly, and you can work with heavier files. In addition, the laptop will run quieter. Isn't it great?
Source: iDownloadBlog